Installation Instructions
Our Locking System
- Integrated UL Listed / CSA certified sealing system
- Integral construction design, time saving assembly
- Ingress protection up to IP69K
- Tamper-resistant, secure and durable connection
- Very good weather and UV resistance
- High impact resistance also at low temperatures
- Temperature range: -40°C(-40°F) to 105°C(221°F), short-term to 160°C(320°F)
- Self-extinguishing premium polyamide formulation, free from halogens and cadmium
- Very resistant to most common chemicals, acids and bases
- Increased rodent protection – no attraction for rodents, termite resistant
- Does not provide a nutrient base for microbes and fungus
- Excellent compression strength, shock and vibration proof connection with conduits
- Manufactured for environmentally friendly recycling, ROHS compliant
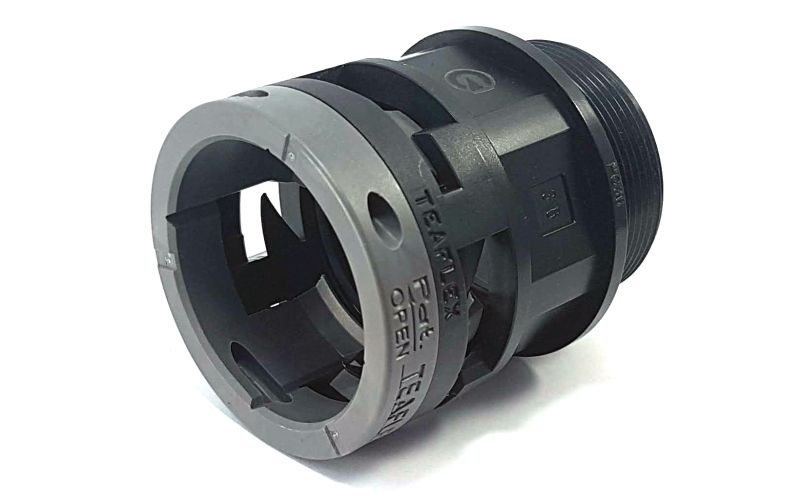
Revolutionary Pre-installed Locking Ring
The Grip Lock system offers everything that one would expect from a conventional non-metallic wire and cable protection system highlighted with notable improvements and added benefits. The revolutionary preinstalled locking ring is the design feature that makes this system really stand out. Forget the frustration of losing locking components. The unique Grip Lock locking ring is integrated directly into the body of the fitting. It grips and locks the conduit in place and provides quality, safety and ease of assembly with a simple twist of the locking ring. Installation security is ensured with the use of a hand held tool. It makes assembly easy and prevents unintended disconnection or vandalism. The Grip Lock time-saving system delivers easy push-in connection of the conduit into the fittings. This allows for a quick and easy interface with all Grip Lock flexible non-metallic conduits.
IP66/ NEMA 4X Installation Instructions
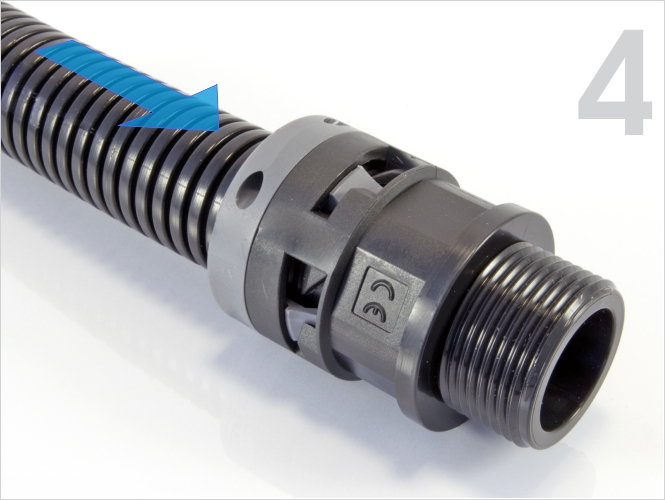
Pull back on the tubing slightly to ensure that the locking collar is fully engaged.
To re-open, simply use the OT tool to bring the locking collar to the open position.
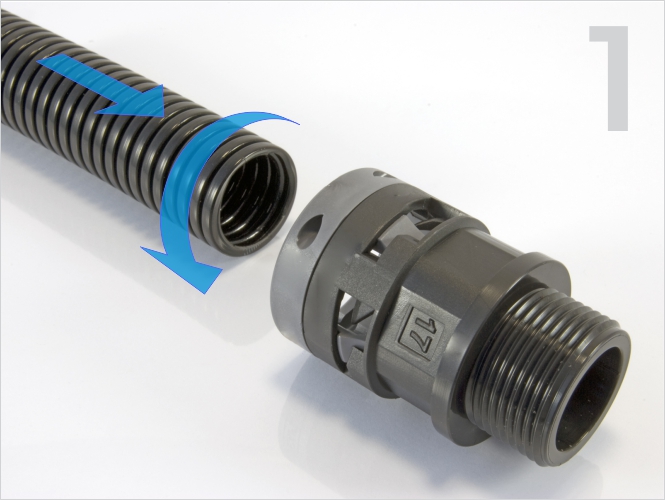
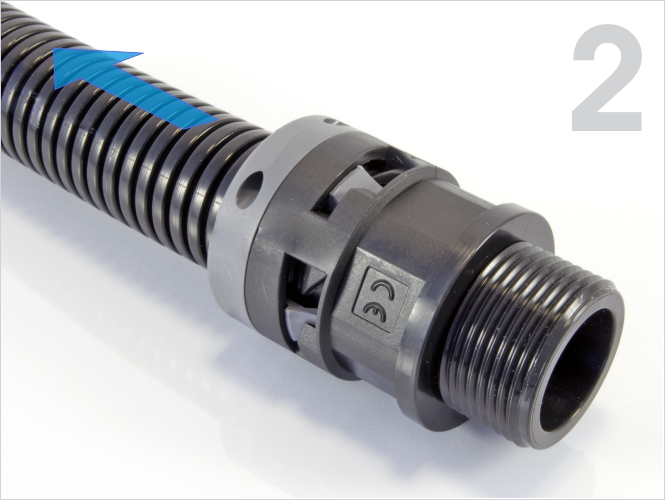
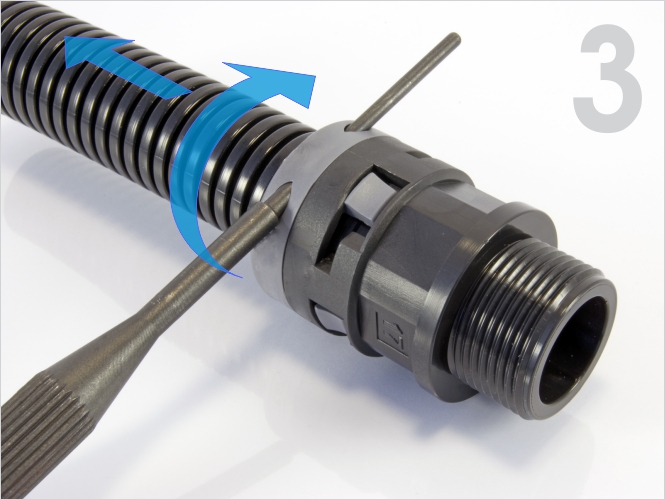
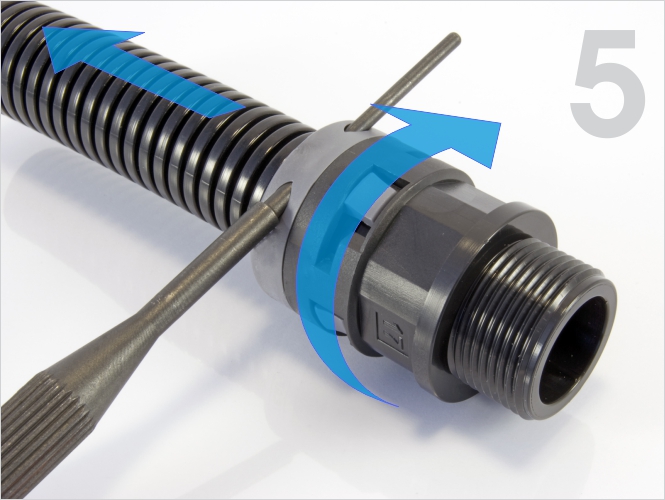
IP68 & IP69K Installation Instructions
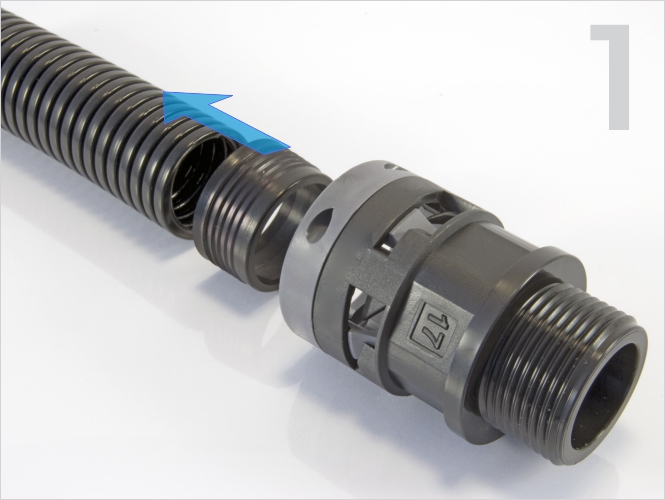
Push the conduit with applied AC sealing
cap all the way into the fitting.
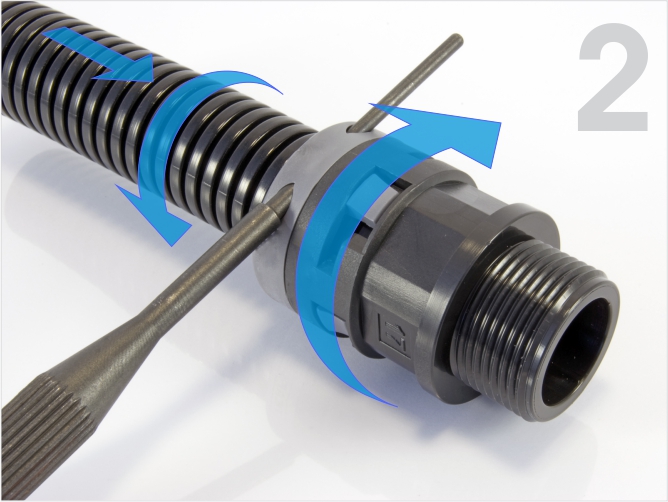
Engage the system by twisting the locking collar to the closed position. For safety reasons, the locking collar will not engage if the seal cap is not fully installed.
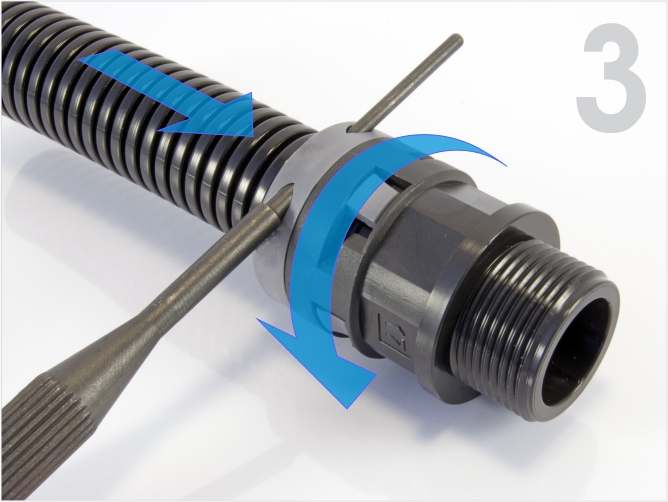
ensure an optimal connection.
To re-open, simply use the OT tool to bring the locking collar to the open position.